
First I had the kids watch this you tube video to get us started:
 |
| Kids decided to make a single pot. I bought a dry white modeling clay to use as I couldn't find wet clay in our area but I probably haven't found the right location yet as I am still getting my bearings. |
 |
| We used pieces of flint to make the markings in the clay as this is the tool the ancient peoples would have used. |
 |
| Kids rolling out their clay |
 |
| Making their marking into the clay and adding the rings |


 |
| our finished pot. this clay doesn't smooth as well as wet clay would have but it gave the children the idea |
 |
| Letting it dry for 24 hours before the kids paint it using old indian markings Just by chance later in the week, we toured the City Museum they had an art booth and it had the proper wet clay that I needed to make a coil pot, so I got to work on it while the kids made their own creations. I tried to enticed the kids to make another coil pot but that was a no go, since we had already done it earlier in the week. So I made it myself and showed the kids each step. |
 |
| The wet clay smooths a lot better than the modeling clays we had used days before |
 |
| Showing part coils and part smooth sides, but the kids wanted the pot to be taller |
 |
| so I added a few more coils to get the proper height |
 |
| The dried version, I only had time to smooth the outside of the pot. However this process showed the kids how the indians would have made a coil pot which was my goal. |
We waited for the pots to dried and then filled both pots up with water. The white clay pot leaked water everywhere while the smooth wet clay pot did not leak water. This helped the kids to see why it was important that the clay be smoothed out before firing.


Next step is for the children to paint their pots and display them in our new classroom!
 |
| Well being kids they decided they didn't want to paint their pots they had other ideas in mind. I printed out a few Mississippian art work patterns and re discussed various themes that we saw in them. MarioFan decided he wanted to use markers to draw on his designs and he struck with circles, dots and lines which was easier to do on this pot. |
 |
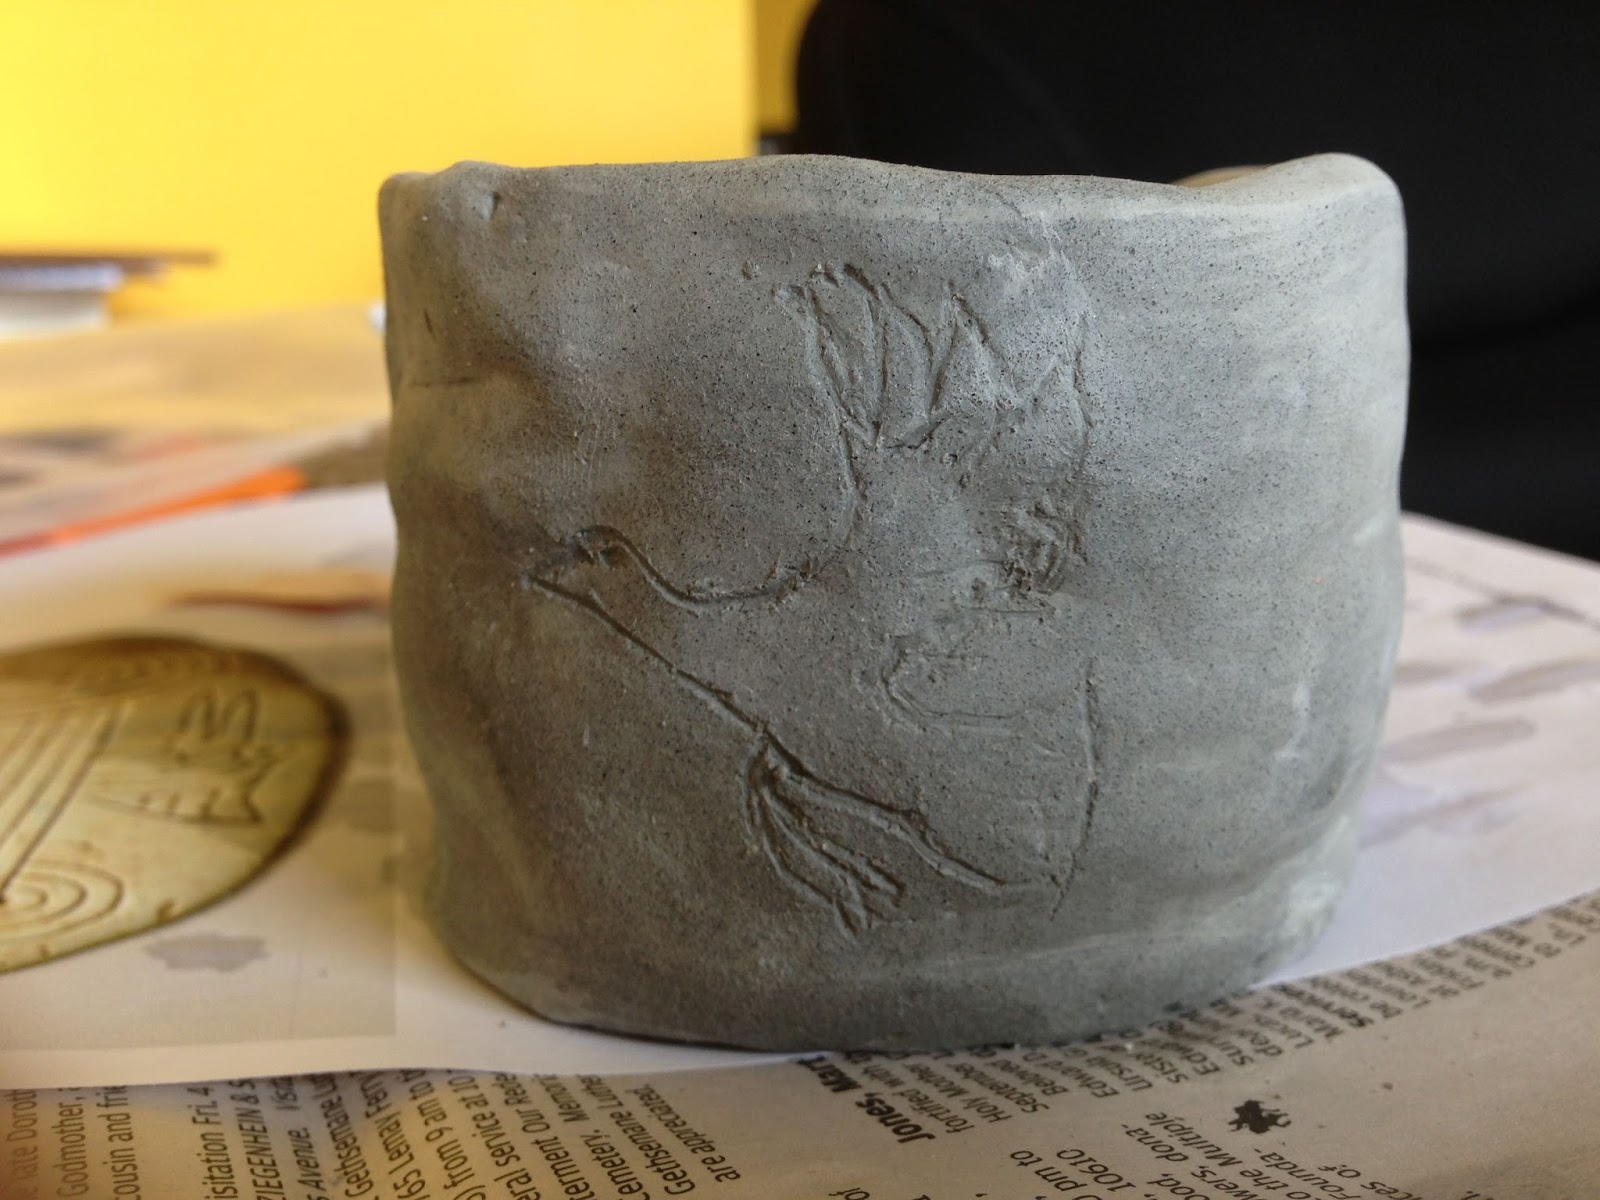
| Firedrake got out a piece of flint stone and rewet her pot and etched several animals into her pot |
 |
| end result for MarioFan |
 |
| And for Firedrake |
Very cool pots, guys! Well done!
ReplyDeleteWe found that smoothing was quite tricky to do successfully even on the wet clay,, as anything that was not smoothed evenly eventually pulled apart when the pot was dried or fired.
They look great! Your children might like the book Sign Of The Beaver by Elizabeth George Speare if they haven't already read it. It's about native American life x
ReplyDeleteThanks for the suggestion I will look for that bookcase have not found or read that one yet
DeleteI believe the type of clay makes a big difference. We've tried various pottery with cheap materials at home with little success. Next time we will have to try the real thing like you did. I'm glad to see it working.
ReplyDeleteInteresting! I never knew that about smoothing coil pots and I did several of them while in school. How did you fire your pots? I have real sensory issues working with clay and outsource those lessons. Unfortunately, Sola seems to have inherited my sensory issues. We're fine with play dough, modeling clay (the type that doesn't dry out), model magic, modeling wax, etc. We just can't stand the type that professionals use. It feel like it is sucking the moisture out of my hands! I have to do a thorough hand washing after working with it and even then, have the willies all day afterwards.
ReplyDelete